Sunday, December 28, 2014

Holiday Cheer

Now that the day is passed and my me-made gifts have been delivered, here's a quick rundown.

I made a couple of Maria Denmark Kirsten Tees for friends. This shirt is so easy to wear and looks good on most anyone, so I figured they might enjoy them.


I also sewed up a couple sets of pot holders


And knit a ruffly scarf for the son's girlfriend.


The boys seemed to like their quilts as well as any 20-something man could be expected to.
nephew wrapped in quilt

 
son taking quilt for a test drive

Hope the holidays brought you plenty to smile about!
Zoe being petted to a fare-the-well at the Pause for Paws event up on campus


Monday, December 22, 2014

All Done But the Wrapping!

Whew! After a marathon binding-sewing session yesterday I can report that the nephew quilts are ready for gifting.

Here they are, draped over the back of the couch. We've been having a delightful spate of gray and rainy weather here on the central coast, so this was my best option for a photo shoot.

Quilt for nephew #1, using most of my red/purple/brown scraps

Quilt for nephew #2, going for blues

Tuns out when you use blues you end up with a water theme, whether you plan it that way or not

Quilt for nephew #3, going for purples and greens


I hope you can see the quilting, at least a little. The Quilt Pixie totally saved my bacon.

 
Quilt for son #1, who said his favortie colors are blue or black


But, acting on the Quilt Pixie's recommendation, I gave him a zippy red backing.
It was touch and go for a little while. The Quilt Pixie lost power during one of our November storms and then had some techinical difficulties firing her magic quilting machine back up again. She finished up my last two quilts in plenty of time, though. It was so worth it to have the quilting done by an expert! Her recommendations on backing, quilting patterns and thread were all just right. She matched the quilting to the theme of each quilt, even down to finding a pattern that looked like neurons for the nephew who's getting his PhD in neuroscience.

Then it was up to me to stitch on that binding. I don't know how many feet of binding were involved, but it felt like miles. My hand sewing skills are not the finest, so my fingers are showing the wear and tear. Here's a tip you might find useful; human saliva contains an enzyme that dissolves the proteins in blood. Don't mention this part to the nephews though, OK?

In between quilts I sewed up a few other items for gifts, but I'll post about those later. Some of the recipients might possibly check my blog and I don't want to ruin the suspense.

Here's an idea for a last-minute gift though:

Get yourself a little bottle of glass etching cream, some Avery labels and a couple of paper punches, like the kind people use for scrap booking. Then pick up some cheap glassware. Cut little stencils from the labels and stick them on the glassware. Paint on the etching cream to transfer the stencils to the glass.

Bingo, you have etched glass. I've done little candy dishes, coffee cups, wine glasses and, like below, candle holders. The candle holders are kind of cute because the flame casts little shadows in the shape of the etching.

Monday, December 1, 2014

Quilt Top Four is Done and Dusted

It's beginning to look like I might actually have four quilts finished in time to gift to boys. 

This is all thanks to the kind souls who assured me it would not be a major cop out to have the Quilt Pixie handle my sandwiching. 


I deviously asked Boy Number Four what his favorite colors were and he said probably blue or black. Black seemed a little too somber to me as the sewist, so I went with blue. Turns out if you use blues you're liable to end up with an undersea motif or two.


Lest you think I'm leaving all the hard parts to a professional, I will be putting on my own binding. I've done some googling about technique. It looks like the recommended method is to machine sew the binding along the edge on the front of the quilt, then flip the binding to the back and slip stitch the edge. These aren't big quilts and we've been doing a certain amount of TV watching on these long winter nights, so I can probably finish that hand sewing in time for the big day. But just in case I find myself pressed for time, would stitching in the ditch to secure the binding on the back be a workable alternative?

These quilts are going to live with twenty-something males, so they're liable to spend at least part of their lives wadded up on a closet floor. I'm not aiming for heirloom quality here!


Friday, October 31, 2014

Quilting Fever

I've been taking a breather from garment sewing (always my first love) to do a quick dive into the world of quilting. I decided I want to give my nephews and my son quilts for the holidays. It's been a tough year in the family, and I figure they could all use a big, warm, cotton-y hug. That means I plan to finish four (count 'em, four) quilts by December 24.


I'm using designs from Cozy Modern Quilts, which I bought at Sew Creative in Ashland. They had a quilt made from one of these designs hanging on the shop wall and I was so fascinated by the construction that I had to get the book, even though I had no concrete quilting plans at the time.

The boys who will be receiving said quilts are all 20-somethings, or, in the case of my son, early 30-somethings. It's an outside chance that they'll be excited to open a quilt on Christmas Eve, even if it is from their loving Aunt Nancy (a.k.a. Mom). I figure I might increase the happiness quotient if I stick to designs that are more angular and modern. Plus (bonus!) bigger pieces that are all rectangles will probably make my life a lot easier.

I'm reasonably certain that none of these young men follow my sewing blog, so here are photos of my first two quilt tops:


and:

I have to say that I'm having more fun with this than I thought I would. Playing with the fabrics and colors is a blast, and, as my friend Martha pointed out, I don't have to worry about whether it's going to fit when it's done.

One thing I've learned so far is that in quilting, accuracy counts. I'm getting pretty snappy with the old rotary cutter and I can eyeball a 1/4 inch seam way better now that I could 3 weeks ago. I'm hoping this new-found respect for precision will migrate to my garment sewing, where I'm sure it would do wonders.

I've only made one quilt in the last 40 years, and that one took me 3 years to complete. It was for The Man's birthday. He got quilt-in-progress photos for two years running. I'm clearly going to need to step up my game if I'm going to meet my deadline.

So, I am a total quilting newbie. Can any of you give me advice about how to handle what I understand is called the "quilt sandwich?" I have to say I'm really liking the idea of taking my completed tops to the Quilt Pixie and asking her to take care of all that pesky batting and backing. Would that be a cop out? If I invest in a walking foot could I manage to quilt something this size at home without driving The Man to drink with my cussing and crying?


Monday, October 6, 2014

Vintage Casual, Gertie-style

I just finished my first go at one of the patterns in Gretchen Hirsch's new book, Gertie Sews Vintage Casual. This is the Zip-Front Dress.


I'm going to take a quick detour to talk about this book, which I've been really enjoying. It includes a bunch of patterns that I'm looking forward to trying. Vintage casual seems to be just the ticket for my dog-walking, retired-person lifestyle.


The book is organized a lot like Gertie's New Book for Better Sewing, with a beginning section talking about her inspiration for the designs and discussing the kinds of tools, materials and skills you'll be learning (including a section on sewing with knits).

In the second section she has patterns for the following pieces, along with instructions for some very cute variations:
  • a 40's style blouse with tucks, which you can turn into darts if you want a sleeker look
  • a flared woven skirt
  • a knit top with neckline and sleeve variations
  • cigarette pants, with variations including 40's style wide-leg trousers
  • a knit pencil skirt that you can flare, or gore for even more drama
  • a pin-up sweater, with instructions for tweaking to a very cute, basic cardigan. I'll be trying that one for sure. 
  • a shift dress
  • a wrap dress designed for woven fabric. I'll be giving this one a whirl too.
  • a halter top (if I were 30 years younger...)
  • and the zip front dress you see above
Gertie says she sizes her patterns pretty close to RTW, but with a curvier bent (a bigger waist to hip ratio).  My bust is a Gertie size 4, my waist is a size 6 and my hips are a size 2. What can I say? I'm a brick. For this dress I decided to start with a straight-up size 6 (36-28-40). I thought a little looseness would be comfortable in the top, the waist might be more or less right and with a skirt this full, why stress about fit in the hips?


I toyed with the idea of doing some flat pattern measurements to double-check for size, but take a look a the shape of this bodice piece:


The bodice back and front are cut as one piece, with the kimono sleeve shaped with a pleat in the shoulder. Looking at it all traced out I had no idea how to measure, let alone how to sew, but Gertie's instructions are clear and the size worked out pretty much just as I'd hoped.

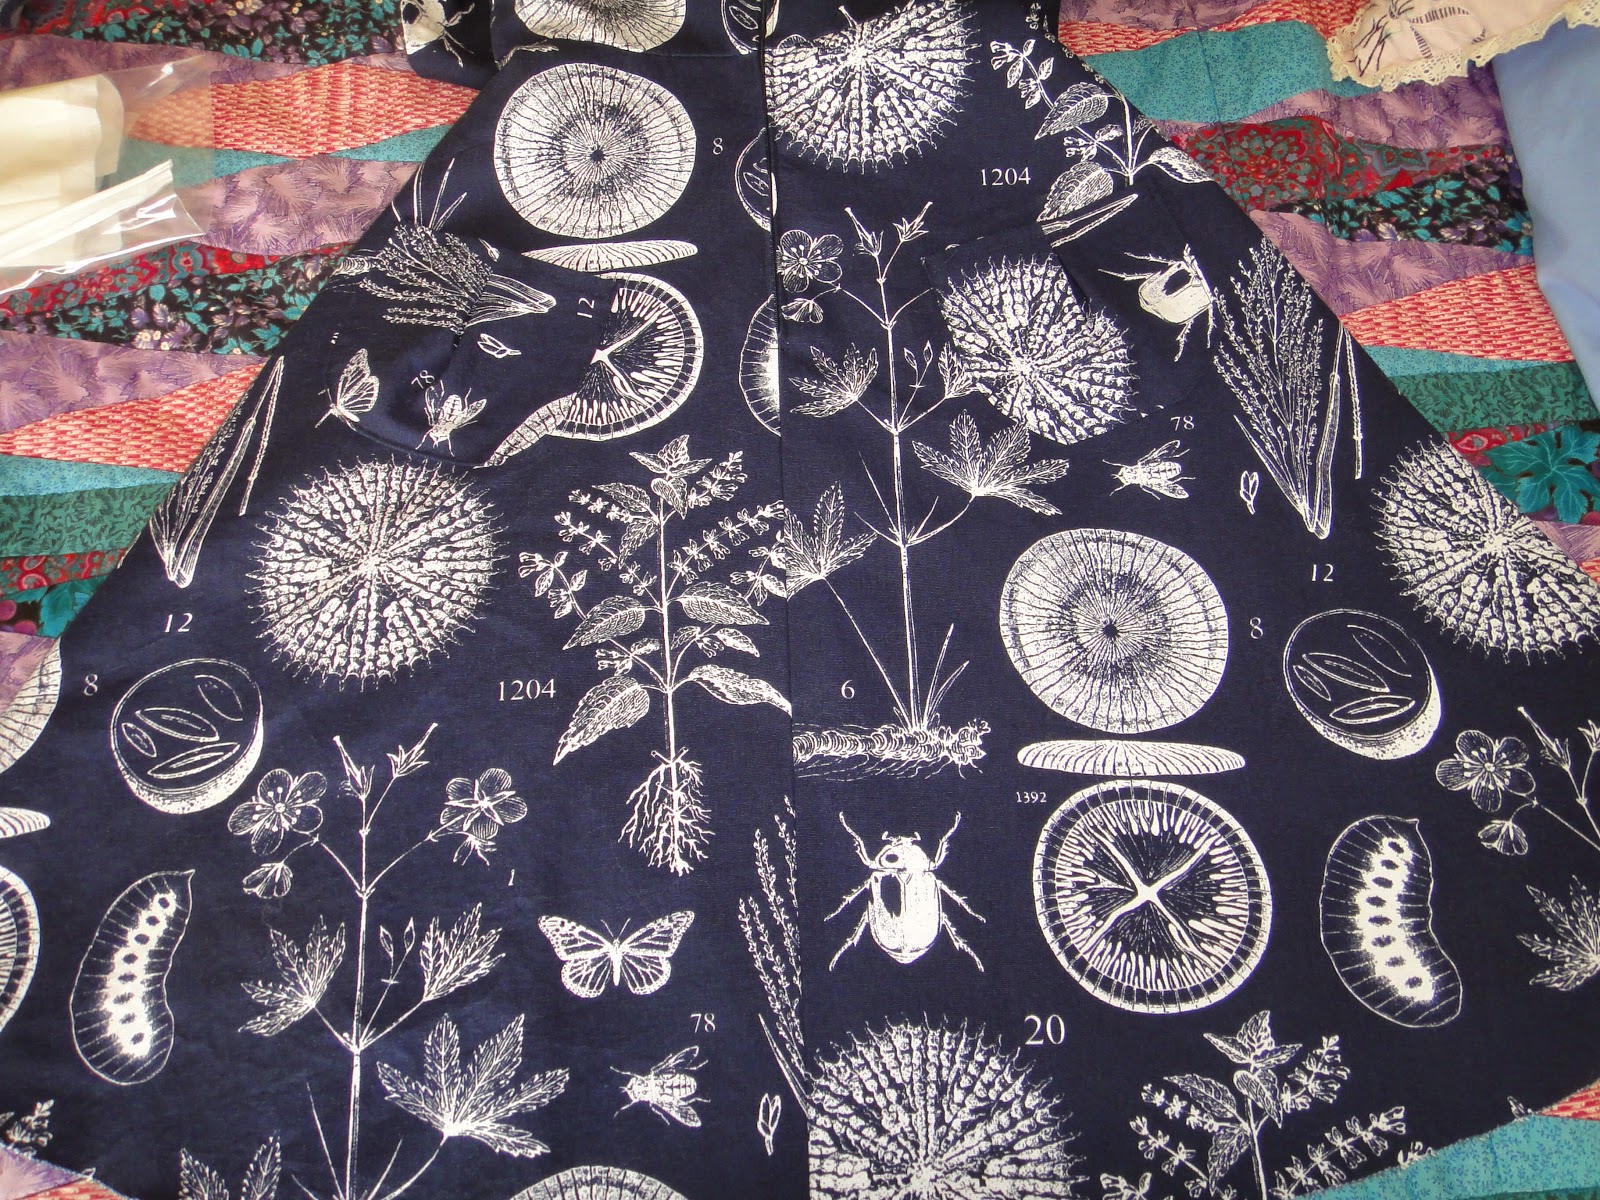
I used a chunk of cotton I got at IKEA because I thought the beetles were cute.

The fabric is really navy and white, as it looks here. Not the brighter blue in the outdoor photos.
When my sewing buddy Jessica saw it she asked if I knew any entomologigists. The fabric is really more a home dec weight, but I was so enchanted with the print that I dove in despite some misgivings.


Gertie advises you to secure 3 yards of 60 inch wide fabric. I had probably 2 1/2. I got the end of the bolt. It required two minds and about 30 minutes to squeeze on all my pattern pieces. Turns out this is a directional print, but no way I could take that into account, so my beetles are climbing up my dress on the front and down my dress on the back.


There are some cute design details that are lost in this print, like patch pockets with little pleats. The collar would be really fun to do in a contrasting fabric. Gertie gives instructions for adding piping to the sleeves and pockets, which I bypassed for this version but will totally try out on my next.

Hand in patch pocket
I really enjoyed sewing this dress! It was a trip to see how the bodice came together. It's very comfortable to wear and I love the zip front. I have plans to make another in an actual garment fabric. 

My pattern review is on PatternReview.com here.


Tuesday, September 23, 2014

Maria Denmark Edith Blouse

I've had so much fun with the free Kirsten Kimono Tee from Maria Denmark that I knew I wanted to try another of her patterns. So here's my version of her Edith Blouse.

 
Edith is a shapely little blouse, with a bit of a retro feel. There are bust darts and fisheye darts (or are they french darts?) in both back and front,  and the side seams are curved to allow you to showcase that hourglass silouette. That's if you have an hourglass silouette. As a brick, I don't display this blouse as it deserves, but I do like it a lot!
 
Can you tell there's a little shaping in the back there?

I used a remnant of a nice, substantial cotton that I got at Bolt while we were visiting Portland in August. I had just enough for the blouse, so it must have been meant to be.


I test drove Edith at the Santa Cruz County Fair a couple of weeks ago and it wore very nicely. It was a warm, end of summer day. The little kimono sleeves kept my shoulders out of the sun but I was cool and comfortable while eating fresh churned ice cream and roasted corn on the cob. I was tempted to put it through it's paces on the mechanical bull, but there were too may little kids in line ahead of me.

My pattern review is on PatternReview.com here.

Tuesday, September 16, 2014

A Little Something

I got a touch of sewing fever last week and completed my trial version of this pattern:


This is A Little Somethin' Jacket from CNT Patterns. I got it for myself as a souvenir from Sew Creative, in Ahsland, while we were there to see Two Gentlemen of Verona. Sew Creative gives a class on making this jacket, and if I lived closer than 410 miles I would sign up in a heartbeat. I bet it would be a guaranteed good time.

Instead I had to muscle through on my own, which turned out not to be so bad at all. There were a couple of tricky bits, like having to pivot a few tight corners while constructing the shawl collar, but the instructions were very clear and it all worked out fine.


I had seen a few samples of the pattern made up at Sew Creative and thought that the simple shape would let me play with a special fabric. It would even be fun to try something artsy, like stenciling.


To me, the style is a bit like the waterfall cardigans that I've been admiring on all my sewing lady's blogs, but with a bit less volume than some of the patterns I've researched. As a short brick I worry about too much fabric floating loose around my mid-section. This pattern has a pretty flat back and just a few ripples at the front lapels. As a waterfall, it's more of a Bridal Veil than a Niagara.


I used some fairly heavy, drap-y rayon jacquard I got at Loes Hines shop in Carmel years ago, when I was first beginning to be enchanted by sewing again. If you're ever in the area, it's a blast to stop by. The shop is stocked with gorgeous clothes made from her designs in a variety of really luscious fabrics. She used to sell her patterns there too, along with some truly beautiful fabric remnants, but last time I stopped by she had carved it down to just the finished clothing. So fun to try on.


I really love this fabric, but I think as a jacket it's a bit too "me" colored. Of course, back when I bought it my hair wasn't quite so grey so there was a little more contrast. It would probably look better with a scarf, or a blouse with a smooth neckline and a bit more color. And something besides wrinkled twill trousers. Overall I do like the neutral color and I think the drape of the fabric is really nice for this pattern. I'm glad I finally bit the bullet and cut into this yardage, instead of taking it out to pet every 3 years and then re-stashing.

My review of the pattern is at PatternReview.com here.