Monday, November 22, 2021

Mermaid Shirt

I sewed up another Burdastyle camp shirt in honor of my granddaughter. She came for a visit a couple of weeks ago and she's very into mermaids right now. She didn't seem too wowed by it, to be honest. She did say that she wanted a mermaid shirt too, but it has to have purple mermaids and I'm not sure I can track down the right fabric. 

But I like this shirt just fine, and that's what really counts, am I right?

I used blouse 116A from the April, 2012 issue of Burdstyle, which is probably one of the first Burdastyle patterns I ever traced out. I can tell because the tracing job is not very good. No wonder I've had trouble getting the collar on right in previous versions.

Here's a close-up of the mermaids. 

And here's a shot of the buttons I used. Pretty nice color match, I think, and the touch of gold brings out the yellow sea weed. I got these buttons ages ago at an antique store in Illinois.

I lengthened the top a couple of inches. It's pretty darn cropped the way Burda shows it. Otherwise, I made it just like they drafted it. I like the fit of this top. It's loose enough to be cool and comfortable enough to wear working in the yard, but it also works for a visit to the Monterrey Bay Aquarium with grandchildren. We kept an eye peeled for mermaids, but no luck.

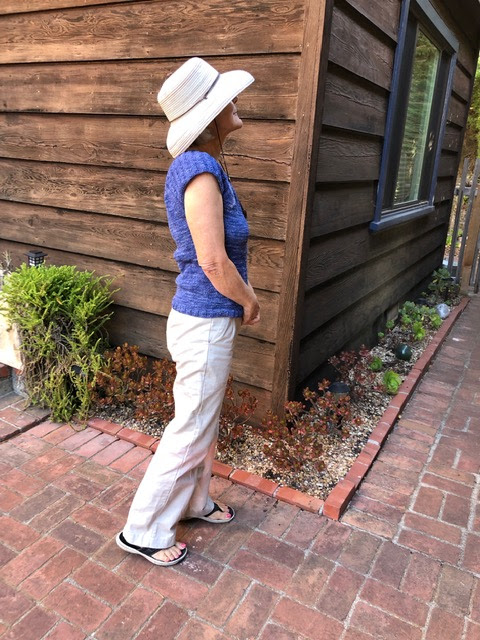
Side view for you.

I finally went through my closet to cull the herd last week and realized I have a lot of woven tops, and a big whack of them I like enough that I just couldn't get rid of them. My normal routine has me grabbing a tee shirt every morning, but I think it's time to give my wovens some love.


It's November 22 and it's almost 80 degrees outside. Camp shirts aren't just for summer anymore here on the Central Coast.

My pattern review is on PatternReview.com here.


Sunday, November 7, 2021

Corduroy Archer

I made The Man a corduroy button-up shirt for his birthday in September and, somewhat to my surprise, I kind of enjoyed the sewing process. I felt a little more competent working the steps that generally make me hyperventilate: the collar stand, the sleeve placket and the cuffs.

I realized that I kind of wanted a corduroy shirt for myself and I might even enjoy the sewing-up part.

I had a pattern I liked, the Grainline Archer, and I even had a piece of baby wale corduroy in my stash. I think I bought it with a pair of Landers in mind, but decided it was a little too light-weight for a pair of pants. Just right for a cozy shirt though.

I'd made a couple of Archers back in the day but the details were fuzzy, so I took a look at the sew-along videos on the Grainline Youtube channel. They are a goldmine of information for sewing any button-up shirt.

I used most of the Grainline techniques, but I threw in a couple tips from Janet Pray's Islander sewing system also, to wit: 

I burrito-ed the cuffs as well as the collar stand and back yoke.

I hemmed the bottom edges before sewing up the side seams. This trick makes it much easier to hem those curvy areas without getting little puckers.

And I think it looks OK on the inside. Better than puckers, anyway.

The shirt is not perfect, for sure, but as far as the sleeve plackets and collar stand go it's the best I've done so far. Cuffs, I had a few issues, but luckily the worst of it is covered by the overlap when the cuffs are buttoned and no one can see anything when the cuffs are rolled up. Those issues, BTW, were not caused by a faulty burrito. That step worked great. I think I have to blame lackadaisical pressing.

I actually had some fun sewing this shirt. Enough fun that I've ordered some cobalt blue linen to make another one. I'm thinking that burrito action will be easier to perfect in a fabric that isn't as beefy as flannel or corduroy.

How many button-ups does one gal need? Apparently, at least four.

My pattern review is on PatternReview.com here.

Thursday, October 21, 2021

Fenix Sweatshirt

I finished my Fenix sweatshirt just in time for our first stretch of moist, chilly weather. Most welcome, because any rain is good rain here on the Central Coast. We're hoping it signals the end of fire season.

I first noticed this Style Arc pattern on Thorneberry's blog and thought it looked like the sweatshirt of my dreams. Slouchy fit, loose sleeves that can be pushed up when necessary, cute pockets: check, check and check. And that side panel just asks for color blocking. 


A word of caution; these pockets are for hand warming, not carrying stuff. The opening goes from top to bottom, so your car keys or cell phone are likely to slip out at an inopportune moment. They do a mighty fine job of hand warming though. They feel like the traditional sweatshirt kangaroo pocket, but IMO they look classier.


 I decided to use a black sweat shirting from Cali Fabrics, my favorite cut-rate fabric store. I wanted some traditional, 100% cotton sweatshirt fleece, which was surprisingly hard to locate. This was $5.99 a yard, which delighted my fabric miser's soul. It was described as heavyweight, but it didn't seem especially heavy to me. Just as well, because you're stitching through four layers of fabric at lots of points, so heavyweight would not be your friend.

I decided on black, even though I have a Great Pyrenees. I was hoping the public side of the sweatshirt fleece would be smooth enough that the dog hair would kind of slide off, but no such luck. Sadly, I'm a Winter and I look like hell in Great Pyrenees colored clothing so I'm learning to live with a constant light coating of white hair.


Here's a closeup of the pocket, complete with stubborn Pyrenees fuzz.


The pockets are the only tricksy part of the construction, and I didn't do the best job. I think they're very cute though. 


Here's s side shot that shows the slight high-low hem. It's subtle, but it makes this oversize sweatshirt look a bit sleeker than it otherwise might.


And here's a back shot. I like that the band in back curves right under the butt. It conceals the most problematic aspect of a leggings-and-sweatshirt outfit.


I finished this top yesterday and I've been wearing it since, which makes it seem like I could do with another. If I can find the right fabric, I'll get right on that. 

My pattern review is on PatternReview.com here.

Friday, October 15, 2021

A Couple Knitted FOs

 These two sweaters got caught in my annual summer knitting slump. For me, knitting generally requires a blustery day, a nice fire and a hot beverage, so the dog days of summer are a wash. Kind of sad in this case because both of these items were this close to being done at the end of spring.

This one is Anker's Summer Blouse, by Petit Knit. Very simple, top down yoked knit. It's designed for a cotton/rayon/linen blend, but I used some Mission Falls superwash merino that I'd had in stash since the Yarn Dogs closing sale back in '02. Not the best choice, but it's wearable. 


I have some linen upstairs in a storm grey that I might use for a version two. The yoke pattern is just a knit one purl one rib, so this would be a nice knit for a beginner. I'm also thinking it would be easy to swap out the yoke stitches for something else, either another textured stitch or a bit of color work. 

The second one is called Canyon Clay, by Drops Design. Drops Design does a lot of cute, free patterns but I've always been afraid I wouldn't understand the instructions. I decided to give this one a try though, and, sure enough, I didn't understand the instructions. Luckily, kaylakitty had a very helpful comment on Ravelry which got me back on track. Basically, you're doing raglan increases like in any top down knit, but for part of the top you do two increases on each side of the front/back and no increases on the sleeves. I know, crazy talk, but that's what makes the raglan line curve sharply to the sides.

It has kind of a cute, squared neckline.

I'd be tempted to make another of these right away, but it uses a thicker yarn than I usually have in stash. The only stitches used are stockinette and 2x2 ribbing, so this is also a simple knit once you wrap your mind around the instructions for the increases.

I used some Berrocco Suede yarn that my friend Jessica gifted to me when she moved to Ashland last year. Only one year in stash - that's quick use for me!

The pattern calls for short sleeves, but when I tried it on for size I decided I liked the cap sleeve look. So literally all I had to do to finish this sweater was pick up the stitches at the underarms and immediately cast off. Why did it take me 9 months, you may ask? Summer slump.

My Ravelry notes are here, in case you're interested.

Wednesday, September 22, 2021

StyleArc Peggy Dress

I got one of those late-night emails about a big sale on StyleArc patterns on Amazon. Which means no shipping, since I have Amazon Prime. I flipped through the patterns on offer and decided to pop for the Peggy dress. 

I was sucked in by the envelope art. Don't they look ready for brunch in a nice restaurant, or shopping in the big city? Especially the polka dot lady. Is that a lap dog in her stroller?


Once the pattern arrived in the mail I started having second thoughts about that elastic waist. I'm a short brick and elastic waists often seem to emphasize my lack of shape. I decided I'd do a trial version with a hunk of what I think is cotton sateen that's been hanging out in my stash for nigh on 12 years. 

Then I checked a few reviews on PatternReview.com and started suspecting that the cute button band on the back was going to involve a lot of work and potential frustration. I figured I'd try to omit it on my (I hoped) wearable toile. I cut out the main pattern pieces and basted the seams and found I could wriggle in and out of the dress with no back opening - huzzah!

Changing the pattern meant that I had to re-jigger the construction, which meant my dumbed-down version probably took longer than the original would have done. It was OK though; it was an enjoyable mental jigsaw and it all worked out in the end.

The pattern was nicely drafted. It uses an all-in-one facing so the finish is much less floppy than separate neck and armscye facings are. And the facing pattern pieces were drafted just a smidge smaller than the bodice pieces so the innards just want to turn under and stay put. I used this Threads tutorial on how to do an all-in-one facing. 

There's also a kick pleat in the back there. I hadn't done one of those for ages but my good friend Google was very helpful and I'm pretty sure I got it done right.

There are two nice, roomy patch pockets that also form belt loops. I don't have a belt that matches this dress very well, but at least the black went with my shoes. 

Here's a shot without the belt. The pattern calls for 1.25 inch elastic, which gives the dress a bit of shape but doesn't give that floof-pinched-in-the-middle look that usually puts me off elastic waist dresses.

I tried the dress on without the elastic and it wasn't bad. In fact, in a fabric with less body it might be pretty nice, but I'm glad I decided to go for the elastic in the end. 

I would like to make another version with the button band, which is one of the details that drew my eye in the first place. Maybe in a nice linen? Hey! An excuse to hop over to Fabrics-Store and enjoy their fabric descriptions. I swear, they're more fun than reading wine tasting reviews. And their linen is very nice indeed.

This is the second Style Arc pattern I've done this month, and I've got another coming in the mail. Thorneberry did a review of their Fenix sweatshirt recently and I'm all in. Now I just have to find some nice sweatshirt fleece, which is easier said than done.

My pattern review is on PatternReview.com here.

Tuesday, September 21, 2021

Rustic Linen Bob Pants

 Here is another pair of Bob pants, from StyleArc. I made these mainly as an excuse to buy 3 yards of natural, heavy weight linen from Fabrics-Store.com. Yes, I got one of those middle-of-the-night sale ads, and I couldn't resist. I have kind of a thing for linen at the moment and they have a variety of weights and some really dreamy colors. And their write-ups are so florid, I want to buy all of them. For example:

"Pale, hazy tones of dawn swept across Paul Nash's dreamy scenes, suggesting a place where all is hushed and still. The warm, pastel green of WILLOW linen was one of his recurring colors, invoking the cold light of frost-bitten grass, whispery strands of freezing fog or dreamy forms that seem to fade into distant, heavenly skies...."


I mean, come on!


Here's a close-up of the fabric. They describe it as "rustic." The weave is kind of slubby and there were even a few pieces of straw included. After a few washings, it still feels a bit rough but it's comfortable to wear and it has a heavy drape that's just right for this pattern. I'm new to linen, but if it continues to soften as it's washed and worn, as linen fans claim, this will be a favorite pair of pants for years to come.

The style reads a little bit "clown pants," but they're so darn comfortable. As a retired person who lives in a beach town with a big student population I can get away with pretty much anything. 

I made these up just as I did my previous pair, except I lengthened the legs an inch at the lengthen/shorten line. I'm only 5'2", so that's a rare alteration for me, but I like that they hit a bit lower on the ankle. I grew up in the era when a pants hem that didn't touch the ground was a fashion faux pas.


Well, off to look at more patterns that need to be made from linen. I really want that Willow color now.

My pattern review is on PatternReview.com here.


Friday, September 10, 2021

Wee Wonderful Doll

 My granddaughter is about to turn three, which doesn't seem possible. Partly, in truth, because of the visits I missed during the pandemic. Thank goodness for FaceTime; my son was very good about pinging me often so I could talk to the kids. 

Since Gogo is now a big girl who can dress herself (more or less) I thought she might have some fun with a Mini-Me doll that she could be the boss of. 

I poked around the internet looking for ideas and ended up deciding to pop for a pattern. Given all the time and focus in the world I probably could have come up with something myself, but boy am I glad I didn't have to try. 

This is the Kit doll from a pattern by Wee Wonderfuls. The pattern includes a doll body, instructions for three wigs and patterns for a playsuit, two blouses, wide leg pants, a pinafore, a basic tee and basic leggings. Theres's even a pattern for little shoes you can stitch out of felt.

Gogo sometimes wears her hair in Princess Leia buns, so I made the Kit doll to match her style.

Here she is in the wide leg pants and the peasant blouse.


And here she is in her birthday suit, so you can see how she's constructed. This pattern has you make the arms and legs separately and tack them on by hand, which seems like an invitation for someone's 4 year old brother to dismember her. Next time I might add a few strategic seams to allow the limbs to be inserted and attached by machine.


The pattern includes clever instructions for making three different wigs out of yarn. I think the hair ended up looking great, but I worry a bit that the hand stitching attaching it to Kit's head won't stand up to toddler play. My neighbor makes art dolls and she kindly gave me advice on this project. She suggested I add a couple lines of glue to her skull to reinforce her hair, which I did. Fingers crossed.

Here she is in her jammies and slippers.


And here she is in a tee and skirt I made from scraps from a dress I made Gogo last year for her birthday (she's still trying to grow into that one). 


Gogo always wears shorts under her dresses, so I make a little pair of shorts for Kit, to preserve her modesty.

Gogo is currently pretty into mermaids, especially purple ones, so I pulled together a mermaid tail for Kit to slip on when she wants to have an undersea adventure, perhaps playing with some of my grandson's sharks. I actually made a toile for this, and I'm glad I did because I think it looks a lot more fish-like than my first effort. I also used one of the decorative stitches on my machine to add a hint of scales. My Babylock has 250 decorative stitches and this is the second time I've used one.


Here's the whole wardrobe. I just need to dream up some sort of suitcase for Kit's outfits and I'll be ready for the party next week. 


My pattern review is on PatternReview.com here.